Showing posts with label DIY tutorial. Show all posts

Monday, June 1, 2015

Indoor fairy garden small world play

As you might know we here at We are Happy Playing are totally in love with all things fairy. We turned our reading corner into an enchanted fairy inspired reading nook (here). We've also made an indoor fairy garden for my daughter's bedroom (here), and had lots of fun making paper mache fairy houses (here). Today I have chosen to write about our fairy garden small world play that my daughter has been enjoying over the last few months.

For our indoor fairy garden small world we used
  • 1 Tray half full with play sand. 
  • A range of plastic flowers
  • assorted craft shells
  • blue pebbles
  • Plastic deco stones
  • twigs from outside
  • blue foam board cut in pond and river shapes
  • tiny cocktail drink umbrellas 
  • coins
  • wooden animal figures on sticks
  • pieces of twirled bark
  • coloured potpourri sticks
  • some odds and ends like mini clay pots and ceramic deco flowers
  • little handmade fairies 
  • Kinder Surprise plastic gnomes
  • small pine cones


The play session began with my daughter building the fairy garden. Unlike most small world play, our fairy garden small world play allows the child to be responsible for setting up the small world's landscape. With this 'game' it is the adult's responsibility to simply supply the child with as many different 'fairy' things to build their garden with and to sit back and watch.

At the beginning of her first fairy garden small world play session my daughter started by establishing where the water features and rocks would go.


Once the ponds, rivers and paths were in place she started adding her fairy house, ornaments like ceramic posts, wooden fence.


After this stage was finished, the little monkey decided it was time to hide 'treasure' for the fairies to search for later. For this my daughter used some coins I had given her. She buried them around the place in 'secret hiding places'. 


Finally finishing touches were addded such as the umbrellas, little animals, fairies and flowers. 


Once the garden was finished my daughter continued to play with her enchanted play set, playing out scenarios where the fairies went searching for treasure, or where they needed to find their way home through the flower forest or where the fairies simply played with the little animals sunbathing all together under the 'beach' umbrellas.  

The garden itself also evolved over the course of the play sessions as my little one continued to arrange and rearrange the flowers and rocks etc. By the time the play session was finished most of the flowers had been removed and replaced by ditches in the sand where the fairies had dug for treasure. The animals too were set to one side and the stones were rearranged to make different paths leading to the lakes. 

All in all I couldn't be more happy with the outcome. The fairy garden small world had required my daughter to use her imagination to the limit. Nothing was fixed, the play possibilities almost endless. It didn't even matter if my daughter played with the fairies at the end, for it was a great enough effort just to build the landscape in the first place. 

I hope this post has given you some ideas for your own fairy garden small world play. Maybe you could make a winter version? If you do send us some photos and leave a comment below. 

Until next time, happy playing.

Sunday, May 24, 2015

DIY Backyard obstacle races without spending money on equipment!


Continuing the theme for Moving it in May we decided to get really inventive and make our very own backyard obstacle course, out of nothing but what we had lying around. Sometimes you find yourself thinking you need to fork out money on expensive equipment for your kids to get a real physical workout. I know I get caught up in that trap from time to time. In Australia we bought everything from trampolines, swings, slides and a climbing set. Now that we are on an extremely tight budget, there is no option but to make do with that we have.

As you can see in the photo above, our obstacle course has 7 elements.  The course was designed to include elements that required balancing, crawling and jumping so that the children were forced to work on their   vestibular system, their core muscles and proprioceptive sense. Jumping, crawling and tumbling also provide fantastic opportunities for children to further develop their body awareness and gross motor skills. 

Note: If you feel your children are not that great on their feet, maybe they have extra physical needs, a good idea to keep them safe is to get them to wear bike helmets. I tried this with my child before I knew that she could manage the course easily.


Following are a few photos to help you see the components of our course, how we made them and how we used them.


The course begins with sliding down this slide, which my in-laws have permanently in the garden. It's just a plastic kids' slide that you could easily pick up second hand if you don't have one. 


Next we found two long wooden poles on the side of the house. Not sure where they came from but we tied them up with some tape and they became the 'balancing beam' to walk across. 


Two more sticks, a few old bricks and tada! you have some mini hurdles. 


We were super lucky to find some old tires in the shed. This made a great balancing element for our course. Initially I thought the kids could jump in them but they decided to walk on them, balancing their way across.


A few old pots spaced like this acted as a running section with the kids having to run, weaving through and around the pots. Though at one point the kids decided to just jump over them. 


This here is a pool noodle cut in half length ways and pinned into the ground in an arch shape using tent pegs. For this element the kids had to crawl under the arch.


The last part required an adult's help to hold the hoola hoop up. For this part of the race, the kids had to do a somersault through the hoop and then run back to the slide, finishing the race.

To make it more of an official race, we wrote out names down on pieces of paper on which I then wrote the times they kids had completed the race in. I used my phone as a stopwatch which made it easy to time each child's attempt. The kids loved finding out if they'd beat their personal best time. I think timing the kids was what motivated them the most to play this game for over an hour. I am sure at the end of it they went through the course at least 30 times. (I ran out of space on the paper for writing all the times down)


Here are some shots of the kiddies going through the obstacle course.


 Anyhow I hope this post has shown you how easy it is to set up a fun physical activity for your children without breaking the bank. Of course the beauty of it is that you can redesign and arrange the course every time you set it up again, keeping the kids interested and challenged!


Until next time, happy playing!


Saturday, May 16, 2015

How we play with the world's largest scrunchie

Yesterday we had the honour of hosting my beautiful nieces' birthday party. Just a casual affair in the backyard with barbaque and cake. The weather was great and the grass was soft and green, begging to be played on. So with that in mind I thought I'll bring out the 'giant scrunchie' and let the kids explore playing with it. I didn't tell them that it was for playing Elastics I just handed it over to see what they would do. The results were awesome and creative.

At first the kids decided to play reindeers and Santa. My niece took the lead as Rudolf and instructed the others to be reindeers and Santa at the end. This occupied them for around 15 minutes, running around the garden shouting out "faster, faster!" At one point they decided to be horses, galloping rather than trotting around while making horse noises.


It seems the scrunchie also lends itself quite nicely to a game of tug-o-war, which the kids found amusing. At first I thought they were fighting over it but then I noticing them laughing and smiling so I figured it was a game instead.


The last of the games that the kids played this day was a simple game of tumbling and jumping over the rope. My daughter loved challenging herself by doing sommersaults over the elastic. The others enjoyed jumping over it or jumping into it. There was also some crawling under it which was fun too. 


It's amazing to watch children be so inventive with just a simple piece of elastic. Maybe sometimes more is less even with kids' toys and equipment. Either way I know that there must be more ways to play with this giant scrunchie and that we will have many more days of fun with it. We might even use it for what it was originally made for and that being Elastics.

Have you made one yet? See my DIY sewing tutorial here and join in the fun!

Happy playing.

Monday, May 11, 2015

DIY gigantic scrunchie for Elastics game!

A while ago I introduced my daughter to the classic schoolyard game of Elastics. While I taught her some basic moves like jumping in and out of the loop, we haven't played the official version of the game yet as she is only 3 years old and not ready for more complicated moves. She also found it more interesting to make her own moves, doing somersaults over the elastic or crawling under it, so I thought I'd just let her go with that and see how creative she could get.

 If you are not familiar with the game Elastics and are wondering what it is, Elastics a classic schoolyard game that is often played by girls. It is played using a long elastic band that has the ends tied together forming a big loop. Two players stand in the middle of the elastic loop and hold it around their ankles, standing opposite each other wide enough that the elastic hold straight but still able to further stretch. A third player then jumps in a particular pattern in and out of the loop, sometimes over it, sometimes crossing it over and other times deliberately stepping on it.  Once the player jumping makes a mistake, for example, either getting tangled in the elastic or not jumping over it correctly, then that player takes an end and the next has a turn to jump. Often the jumping actions are accompanied by rhymes or songs. As you complete the pattern at the  first level, which is ankles, the elastic is then hitched up to knees, then under bums, hips, waist, underarms, neck and sky. As a kid I was only ever good enough to jump as high as waist.

When I first introduced my little one to the game I just simply got a long piece of elastic and tied it at the ends.  It was a thin piece of elastic, around a quarter of an inch or 0.5cm and I found it hurt their skin a little when they would run into it stretching it to full capacity. It was also a little difficult to see when jumping on concrete surfaces as the white of the elastic blended a little with the colour of the concrete. So with this in mind I thought about how I could make the elastic more colourful and 'softer' for the children to play with After some thought I came up with the idea of turning the elastic into a giant scrunchie, an easy way to make the elastic more colourful, thicker and a bit softer for the kids. Below are instructions so you too can make your own Elastics scrunchie

What you will need

  • Fabric/s non-stretch
  • Scissors
  • Sewing machine
  • Rotary cutter
  • Quilters ruler 
  • Cutting board
  • Sewing thread
  •  Quarter inch thick elastic 
  • Safety pins x2 

First cut a long piece of elastic measuring around 14.8 feet. Doesn't matter if it is larger but I wouldn't recommend smaller. Once you have cut your piece then get someone to help you stretch it as far as it goes and then remeasure it. You need your fabric to be just a bit longer than the elastic at full stretch.

Once you have those figures, cut out your fabric at 3 inches wide and in pieces that add to your required length plus seam allowances. So if you are using various fabrics and have pieces say 3inch wide and 10 inches long,  then cut your length at 10.5 inches long as you need to add  half an inch to every piece to accommodate for an 1/4 inch seam on either side. 


Once you have done that simply sew the ends together, right sides facing. If you are using different coloured fabrics don't forget to have the two end pieces different colours so that you don't have two of the same when you join them at the end.


After you have sewn the pieces all together, fold over the 3 inch width and sew an 1/8 of an inch from the edge. See photo below.


Once you have done that you should have a long 1.5 inch wide and 17.8 feet long snake of a thing. Unfortunately that was the end of the easy part of this project, now comes the part where you have to turn it all inside out! In order to do that get hold of a safety pin that is not going to open as you thread it through. I used one that is for baby cloth nappies to make sure it wouldn't open. See photo below.


With a bit of fiddling, get the pin to go through the tube by scrunching the fabric over it with your thumbs. Here is a quick YouTube video I found that shows you how to do it. This is not my video so I can't take credit for it, but I still don't know how to load videos on my blog so sorry.


Once you have conquered the turning of the giant scrunchie, you then need to thread the elastic through. Take two safety pins now. Using one of the safety pins, attach one end of the elastic to one end of the tube, securing it so that it doesn't go into the tube while you push the other end through. With the other end, hook the other safety pin onto the end of it and push it through the tube like you did before. Don't worry this time it is easier!


After that is finished, take both end of the elastic, and using the sewing machine and a zig zag stitch, sew the pieces together. Push one fabric end into the other and the raw edge of that side under and simply sew the opening shut using a straight stitch. See photo below.


And there you have it, your very own soft and scrunchie elastic to play with! Or perhaps you've just made the world's biggest scrunchie ready for the Guinness Book of World Records?

Next time I'll have to post about playing Elastics and other games that your kids can play with their giant scrunchie!

Until then happy sewing and happy playing.

Thursday, April 30, 2015

DIY Paper mache fairy house tutorial

It is no secret that at the moment I have become somewhat of a fairy freak! I am obsessed with fairy gardens, fairy accessories and now fairy houses!

Desperate for more 'fairy stuff' for my daughter's fairy themed reading corner I scrounged around the house the other day looking for odds and ends from which I could make a fairy house. I also went online and searched YouTube for some inspiration. What I found was a great fairy house tutorial which used a lot of fancy scrap booking tools and materials (which I don't have and will not fork out the money for) but the best part of the tutorial was that it used some paper mache to give the house texture. And this is the part that gave me an idea!

What if I took the few toilet rolls, some corrugated paper, badminton shuttle cocks and tissue paper I found around the house and used paper mache to bring it all together into a neat little fairy house? Well needless to say the idea worked! And for all of you out there who are also crazy for fairy stuff the following is the tutorial for how to make one of these little guys. Enjoy.


What you will need 
  • Toilet paper roll
  • corrugated paper
  • tissue paper 
  • plastic shuttlecock (not the ones with feathers)
  • Poster paints
  • Primer or white undercoat paint
  • Paint brushes of varying sizes
  • PVA craft glue
  • Wall paper glue mix or just diluted PVA craft glue for paper mache
  • Scissors
  • Yarn scraps
  • Optional hot glue gun
  • Varnish 

First, cut a piece of corrugated paper that fits around your toilet roll. You can make it exactly to the height of your roll or leave it longer like I did for a taller house. Once you have done that, using PVA craft glue, glue the corrugated paper to the toilet roll.


To add features like windows and doors, cut a few pieces of yarn and using PVA again, glue the string to the house to form the outline of the windows and door. You can make them whatever shape you want. As you can see, I have gone for porthole like windows and an arch door.  At this point let the glue dry.


Next cut up your tissue paper into smallish pieces and get some wall paper glue mix, like I have, or some diluted PVA glue ready.  Wet the pieces of paper with glue and using a brush press the pieces over the yarn so that it gets into the grooves. Cover the whole house with tissue paper in this manner leaving your features to still stand out.

Sorry for the horrid photo below, I only had green tissue paper and the colour has run. But trust me it's tissue paper not paint!See how I use the brush to push the tissue paper into the grooves?


Once you have done that give it a good 2 coats of undercoat or primer. I used old wall paint primer. The photo here shows you where I used the hot glue gun to put in some finer details around the door and the crosses in the windows. This is optional and you can just paint the features in later if you don't have a hot glue gun.


Get your shuttle cock now and paper mache about 3 to 4 layers of paper over the whole thing until you feel it is thick and stable enough. Once finished let it dry a bit and then coat it with 2 coats of primer.


Once the whole thing is dry, glue both pieces together like so, using PVA or the hot glue gun. The roof should fit snug over the main house.


Once the primer is dry it is ready to paint. First decide on your main colours and paint the different sections using the base colour.. Once you have done that, start adding some darker and lighter versions of the same colour to create shadows and depth. Using black and a thin brush outline features like windows and the door and I like to paint the bottom of the roof too with black strokes to give it some form. Use some while to highlight the texture of the corrugated cardboard and to add white spots to the roof. Using several shades of green dab paint with a small brush to give the effect of greenery or moss.


Once the the whole thing is painted and you are happy with it, let it dry. Once dry, give it a coat of clear varnish for protection and to make the colours really pop and shine.


Again let the whole thing dry really well and when it has it is FINISHED, ready to bring magic and enchantment into your home. I do not recommend this little fairy house for outdoors. If you are putting it in an indoor fairy garden I would be careful not to get the bottom dirty with dirt as it might rot the paper. Otherwise it should be fine on gravel and sand that is not wet. But then again if you are very careful to paint under the bottom with two coats of varnish I guess a little dirt and moisture won't hurt it.

Anyhow I hope this tutorial has been helpful , easy to follow and inspiring. Please leave a comment and let me know if you end up making one or many. I would love to know how you go.

Happy fairy house making and happy playing.

Wednesday, April 29, 2015

Fairy Gardens, a place where children can daydream


It seems that with spring truly here and summer just around the corner, fairy gardens are becoming a popular topic on children's play blogs and Facebook play groups. If you look online you will find a multitude of inspiring photos of beautifully crafted fairy gardens with all the little fairy garden furniture trimmings. It's really hard not to be inspired! Who wouldn't want a magical, whimsical fairy land in their own backyard? Something to admire and to inspire fairy daydreams. A living, growing wonderland.

For me, fairy gardens are more than just a whimsical addition to the garden, they are a great way to get children into gardening and an even better way to teach children responsibility for another living thing without having the trouble of a pet. No fairy garden thrives without being watered, fed, and given enough sunlight. Thus the child must remember to water and fertilize their little paradise appropriately and make sure it stays in a spot with enough sunlight depending on what type of plants are in it. I guess they also learn to look without toughing as fairy gardens are great to look at but not something you play with.


For our fairy garden we decided on an indoor version. Our local hardware and garden store has hundreds of indoor plants and there is a specific section with these tiny little plants for around 1€.

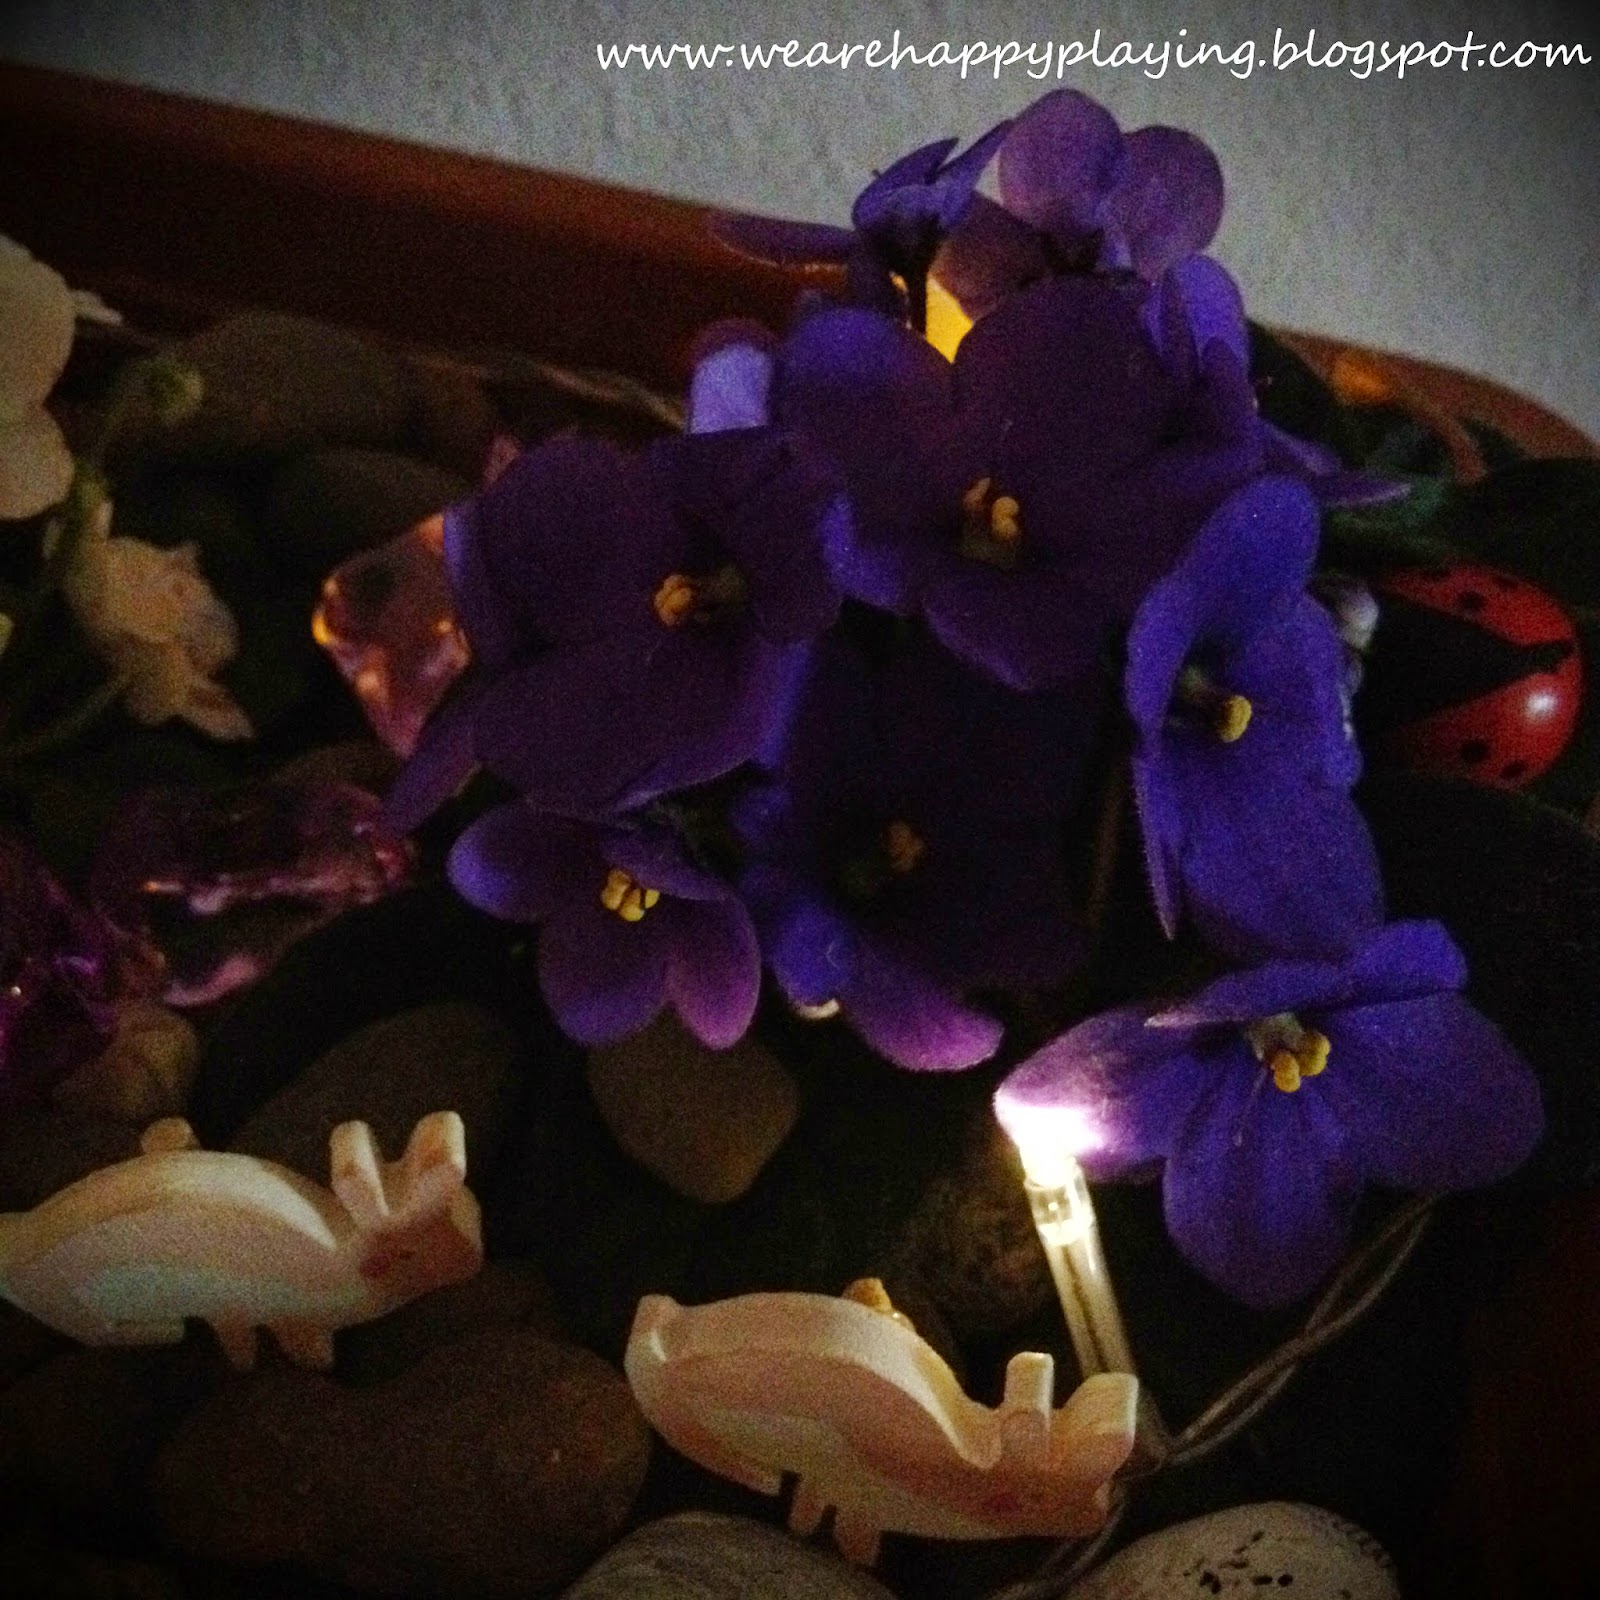
For the base of our garden we bought a plastic terracotta planter and base which we drilled holes in the bottom of for drainage. Very important! My daughter was given the honour of filling the garden with potting mix and compost and then planting the little flowers and greenery. For those of you who are wondering, the flowers are miniature African Violets, great indoor plants!


After planting the garden, my daughter topped the garden with some rocks from our driveway. This will make it look nice and neat and keep the soil moist.
Here is the finished garden at this stage, all ready now for wonderful fairy accessories!


Now with accessories, you might say we went a little overboard. It all started with some simple little wooden animals I'd painted for Christmas tree decorations. Hot glue and a toothpick on the back and I was able to stick them into the soil so they would stand upright. With some blue rocks, bought from the 1€ shop, we made a river. The fairy house is made from gluing little sticks over a toilet roll and then using some felt and coloured paper to create the roof and door. The windows are foam flowers and the roof is embellished with a little wooden ladybug, plastic leaves and flower. Pretty ribbon is also stuck in place around the base just to make it all the more pretty.


The clothes line is made from two sticksand a bit of sewing thread tied between them and then a little dress which I cut out of felt, hung with little pegs I got from the craft store. The fairy, herself, is made from a wooden peg by attaching some wool with glue for hair, drawing the face on with markers and then gluing some felt pieces to form the dress. The wings are from an old butterfly ornament. A few more wooden ladybugs and viola it's finally finished.

In the evening we also experimented with some lighting. We tried the fairy lights and LED tea candles behind the plants to give it a dramatic look. The results were not too bad but I would like to continue to work on it to get the look just right. I am going to ask my husband if he can wire something up that will let us stick tiny LED lights in strategic places rather than on a cord like the fairy lights. The cord is just too hard to hide.


So there it is, our very own magical indoor fairy garden. My daughter loves looking at it and swoons over it, sighing and whispering "oh it's so cute!" She's tried to play with the bits and pieces but I remind her not to touch it, that it's just for looking and she seems to be OK with that. (I plan on making a playable version soon) My daughter has also started telling me that the fairies come at night when she is sleeping to look after her when she sleeps. It's so wonderful too see that her imagination has been sparked by such a simple addition to her bedroom.

Hope you have been inspired to make your own garden. They really are a lot of fun and quite addictive. I'm already buying bits and pieces for one in my bedroom. If you make one I'd love to hear about it in the comment section. Maybe even share some photos.

Until next time happy playing