Do you remember that scene in the movie Miss Congeniality where Sandra Bullocks character is dressed like a Bavarian cream puff playing glasses filled with water? I was always fascinated by that scene. I would wonder 'Is that just a Hollywood trick or can you really play glasses filled with various amount of water like that?' While I don't have the musical skill to set up something as extravagant as what was in the movie, I did get to thinking about how we could try something similar but keeping it at a basic level. Something that would be easy for my 3 year old to understand and enjoy.
Here is what we ended up doing for our musical glasses experiment.
What we used
food colouring 4 various colours
a jug of water
4 glasses of the same size and shape
1 teaspoon
1 measuring syringe that you use for measuring 5ml of medicine for children.(usually comes in a box with Panadol or Nurophen
To start this musical experiment we started by using the syringe to fill the glasses with different amounts of water. By using a measuring tool we could record how much water made what sound. We could test how many more milliliters of water was needed to make a noticeable difference in sound between two glasses. If I has a guitar tuner I could measure small amounts of water in order to create specific notes, but unfortunately mine is in Australia. Something that precise might also be better for older children to explore rather than my 3 year old.
Between filling the glasses with different amounts of water we would play the glasses to test the difference in sounds and if we were able to achieve different notes. We found that there was not much difference between 25 mls and 50 mls but there was a noticeable difference between 25 mls and 100mls. In order to remember our findings we made a quick note about how many measuring syringes we used for every glass. This could be something older children could do themselves.
Once we had our desired notes we coloured each glass with a different colour using food dye. The reason for doing this was this...
By having different colours you could write a piece of music, well not in a technical sense, but by following the colours your child would be able to play a simple song. Ours is for Mary Had a Little Lamb.
I think the beauty of this activity lies in its educational value. There is so much maths involved.
Counting out how many times you've squirted water in each glass.
Comparing different amounts
Following patterns
Recognising colours
It is also a very lovely kitchen science experiment that costs close to nothing, just a bit of food dye. The experiment could be extended by using different materials to tap the glasses with. While I don't have a photo of it, we also used a wooden spoon to tap the glasses which gave us a totally different sound quality. Using different size or shaped glasses also affects the sounds produced, something for us to try and experiment next time.
Even if you are not interested in its educational potential this activity does seem to involve the two things toddlers and preschoolers love best. Water play and hitting things to make music. I know my daughter enjoyed herself immensely. I hope you get to try it too!
Yesterday we had the honour of hosting my beautiful nieces' birthday party. Just a casual affair in the backyard with barbaque and cake. The weather was great and the grass was soft and green, begging to be played on. So with that in mind I thought I'll bring out the 'giant scrunchie' and let the kids explore playing with it. I didn't tell them that it was for playing Elastics I just handed it over to see what they would do. The results were awesome and creative.
At first the kids decided to play reindeers and Santa. My niece took the lead as Rudolf and instructed the others to be reindeers and Santa at the end. This occupied them for around 15 minutes, running around the garden shouting out "faster, faster!" At one point they decided to be horses, galloping rather than trotting around while making horse noises.
It seems the scrunchie also lends itself quite nicely to a game of tug-o-war, which the kids found amusing. At first I thought they were fighting over it but then I noticing them laughing and smiling so I figured it was a game instead.
The last of the games that the kids played this day was a simple game of tumbling and jumping over the rope. My daughter loved challenging herself by doing sommersaults over the elastic. The others enjoyed jumping over it or jumping into it. There was also some crawling under it which was fun too.
It's amazing to watch children be so inventive with just a simple piece of elastic. Maybe sometimes more is less even with kids' toys and equipment. Either way I know that there must be more ways to play with this giant scrunchie and that we will have many more days of fun with it. We might even use it for what it was originally made for and that being Elastics.
Have you made one yet? See my DIY sewing tutorial here and join in the fun!
A while ago I introduced my daughter to the classic schoolyard game of Elastics. While I taught her some basic moves like jumping in and out of the loop, we haven't played the official version of the game yet as she is only 3 years old and not ready for more complicated moves. She also found it more interesting to make her own moves, doing somersaults over the elastic or crawling under it, so I thought I'd just let her go with that and see how creative she could get.
If you are not familiar with the game Elastics and are wondering what it is, Elastics a classic schoolyard game that is often played by girls. It is played using a long elastic band that has the ends tied together forming a big loop. Two players stand in the middle of the elastic loop and hold it around their ankles, standing opposite each other wide enough that the elastic hold straight but still able to further stretch. A third player then jumps in a particular pattern in and out of the loop, sometimes over it, sometimes crossing it over and other times deliberately stepping on it. Once the player jumping makes a mistake, for example, either getting tangled in the elastic or not jumping over it correctly, then that player takes an end and the next has a turn to jump. Often the jumping actions are accompanied by rhymes or songs. As you complete the pattern at the first level, which is ankles, the elastic is then hitched up to knees, then under bums, hips, waist, underarms, neck and sky. As a kid I was only ever good enough to jump as high as waist.
When I first introduced my little one to the game I just simply got a long piece of elastic and tied it at the ends. It was a thin piece of elastic, around a quarter of an inch or 0.5cm and I found it hurt their skin a little when they would run into it stretching it to full capacity. It was also a little difficult to see when jumping on concrete surfaces as the white of the elastic blended a little with the colour of the concrete. So with this in mind I thought about how I could make the elastic more colourful and 'softer' for the children to play with After some thought I came up with the idea of turning the elastic into a giant scrunchie, an easy way to make the elastic more colourful, thicker and a bit softer for the kids. Below are instructions so you too can make your own Elastics scrunchie
What you will need
Fabric/s non-stretch
Scissors
Sewing machine
Rotary cutter
Quilters ruler
Cutting board
Sewing thread
Quarter inch thick elastic
Safety pins x2
First cut a long piece of elastic measuring around 14.8 feet. Doesn't matter if it is larger but I wouldn't recommend smaller. Once you have cut your piece then get someone to help you stretch it as far as it goes and then remeasure it. You need your fabric to be just a bit longer than the elastic at full stretch.
Once you have those figures, cut out your fabric at 3 inches wide and in pieces that add to your required length plus seam allowances. So if you are using various fabrics and have pieces say 3inch wide and 10 inches long, then cut your length at 10.5 inches long as you need to add half an inch to every piece to accommodate for an 1/4 inch seam on either side.
Once you have done that simply sew the ends together, right sides facing. If you are using different coloured fabrics don't forget to have the two end pieces different colours so that you don't have two of the same when you join them at the end.
After you have sewn the pieces all together, fold over the 3 inch width and sew an 1/8 of an inch from the edge. See photo below.
Once you have done that you should have a long 1.5 inch wide and 17.8 feet long snake of a thing. Unfortunately that was the end of the easy part of this project, now comes the part where you have to turn it all inside out! In order to do that get hold of a safety pin that is not going to open as you thread it through. I used one that is for baby cloth nappies to make sure it wouldn't open. See photo below.
With a bit of fiddling, get the pin to go through the tube by scrunching the fabric over it with your thumbs. Here is a quick YouTube video I found that shows you how to do it. This is not my video so I can't take credit for it, but I still don't know how to load videos on my blog so sorry.
Once you have conquered the turning of the giant scrunchie, you then need to thread the elastic through. Take two safety pins now. Using one of the safety pins, attach one end of the elastic to one end of the tube, securing it so that it doesn't go into the tube while you push the other end through. With the other end, hook the other safety pin onto the end of it and push it through the tube like you did before. Don't worry this time it is easier!
After that is finished, take both end of the elastic, and using the sewing machine and a zig zag stitch, sew the pieces together. Push one fabric end into the other and the raw edge of that side under and simply sew the opening shut using a straight stitch. See photo below.
And there you have it, your very own soft and scrunchie elastic to play with! Or perhaps you've just made the world's biggest scrunchie ready for the Guinness Book of World Records?
Next time I'll have to post about playing Elastics and other games that your kids can play with their giant scrunchie!
Here at We are Happy Playing, we will be celebrating May as the month for movement! We are calling it Moving it in May. Why? Well first of all here in Northern Europe the sun is finally starting to shine again, the days are longer and warmer and it's making us all feel like we better take advantage before fall and winter come again! Also it's no secret that kids these days are spending more time doing sedative activities, with screen time being a huge contributing factor. We also know that this leads to health problems but sometimes as parents we are not that sure about how much and what kind of movement and activities our children need or how a lack of movement can really affect our children. For this reason, and to kick off Moving in May, I have asked an EXPERT!
May I introduce the awesome and very much in-the-know Cara Sheekey, Occupational Therapist. I'm not exaggerating people,she really is awesome! I know this because I had the privilege of working with her at Yarraville Special Developmental School in Melbourne. Her advice, guidance and strategies helped me bring movement into my classroom in ways that improved my students, all who are with physical disabilities and sensory processing issues, physically, behaviourally and academically! So without further ado, I here by present...
We are Happy Playing's interview with
Occupational Therapist Cara Sheekey on the topic of children and movement.
First of all, thank you Cara for agreeing to do this interview with us. Can you tell us a little about yourself, education, experience and what you are currently doing in relation to your work with children.
My undergraduate degree was an Applied Science degree in Exercise and Sports Science. Following that I did a Masters degree to qualify as an Occupational Therapist. I have spent the thirteen years since I graduated working as a Paediatric Occupational Therapist, in Sydney, the United States and currently in Melbourne. During that time I have worked in private practice and in both special schools and mainstream schools. I now have a small private practice in Melbourne, in partnership with a Speech Pathologist. We specialise in the assessment and treatment of children with complex developmental needs; including Autism, Sensory Processing Disorder and other developmental challenges that impact upon a child’s capacity to reach their potential. We take a play based developmental approach guided on the principles of DIR®/Floortime
One of the things I worry about as a parent is the amount of movement my child is getting during the day. In your opinion how much movement do children really need in their day? My immediate answer would be that the general recommendation is 60 minutes of moderate to strenuous exercise every day for all people (parents too!). This figure though is generally given in regard to school aged kids, teenagers and adults, not pre-schoolers. Knowing that you have a pre-schooler (as I do) when I thought about that recommendation I realised that it couldn’t possibly be enough for them, they need WAY more than an hour a day of physical activity. As it turns out, at least three hours a day is the recommendation. I even came up with a reputable source to prove it. Link to reference article While one hour for the school aged kids and adults refers to moderate to strenuous exercise, the figure for the pre-schoolers refers more generally to time being active and moving around to play. How does a lack of movement affect our children? The most obvious answer is that lack of physical activity is a major contributor to obesity and other associated health issues. The impact of a lack of physical activity is far greater though than whether or not your child is overweight. It is through movement based play that many aspects of our nervous systems are developed. While we talk about the five sense quite often (touch, taste, smell, hearing, vision) there are in fact two other senses that are very relevant to this topic – the vestibular system and the proprioceptive system. The vestibular system is our sense of movement, knowing the position of our body relative to gravity (knowing if you are upright or standing on your head, if you are moving forward, if you are falling, etc). The proprioceptive sense is our body position sense, it tells us the position of the various parts of our body in space and relative to one another (knowing if your hands are in front of your body or by your side, knowing how hard you are pressing on something, etc). These two sensory systems work together very closely to help us to use our bodies and successfully interact with our environment. The neurological connections required to help these sensory systems to mature and work for us are developed through use, and we use them by moving. Another very important thing that is developed in the early years through movement is core strength. Our core strength is what helps us to maintain a stable upright posture. This is good for many obvious reasons, like being able to stand up and not fall down because your muscles have fatigued, but it is also vital in providing a solid base from which to then use your limbs in more precise ways. For example, to be able to sit and write or draw you need to develop adequate core muscles to be able to support your body upright and hold your trunk and shoulders steady while moving only your hands/fingers to make precise movements. Like our sensory systems, core muscles are developed through use, and we use them by moving. The development of these sensory systems, in addition to core strength and endurance, is vital for children to reach their potential in a number of areas that go far beyond movement itself. Sure, they need these skills to be good athletes but they also need them to do well in a classroom. Challenges in any of these areas can impact fine motor skills, which impacts handwriting development and potentially literacy development, a poorly developed vestibular systems can impact attention and concentration, poor proprioception can make it difficult for a child to maintain their own personal space around others and so on (really, I could go on but I’m sure you get the gist, movement is important!).
Is letting our children 'run around' in the backyard enough or are there particular types of movement that are more critical for child development? I always say that it is best to follow your child’s lead. Running around the backyard can be great and for some kids they may well get enough movement out of playing and running around in their backyard. Other kids may struggle to come up with ideas and if you send them out into the backyard to “run around” they may not do much moving at all. Connect with your child, see what interests them and engage with them around that and you will be moving in no time. If you are struggling with a child who is reluctant to step away from the screens and move, go with them and play together. Kids love nothing more than playing with an engaged adult and the benefits go far beyond their physical health. There aren’t any specific movement types that are necessarily more important, but variety is key. To develop the sensory systems we talked about earlier you want to be engaging the sensory motor systems in many different ways. Exposing your child to a variety of sensory motor experiences is important. Finally, the best way to ensure that your kids are active is to lead by example, run around with them, go on a bike ride together, play at the playground with them. If kids see their parents being active that becomes their normal, what they assume everyone does, and they are much more likely to grow up to be active adults. Link to reference article You spoke about the importance of two other senses the vestibular and proprioceptive sense as well as core strength. What are some activities that help develop a child's vestibular system,
proprioceptive system, and core strength?
Many movement activities that children engage in will include activation of both the vestibular and the proprioceptive systems, and strengthen their core muscles as well. Here are some specific examples though for each one:
Activities with a strong vestibular component:
Somersaults, flips, handstands, cartwheels
Jumping games; trampoline, on couch/mattress or bed
What about being part of sports teams or dance groups several times a week? Is that enough and are they a viable way of getting your child moving? Sports teams and movement type classes can be great for many reasons, and they are certainly a viable way to get your child moving. They aren’t essential though by any means. Again, I believe that it goes back to following your child’s lead and their interests. Parents regularly ask me what sport or class they should enrol their child in and I always ask, “What is the child wanting to do?”. Give them some options, go and trial a class or observe one and see if it appeals to your child. If you are intent on helping your child move more and you push them in to something they aren’t interested in, or ready for, you probably won’t meet your goal of getting them moving, and you will get lots of added frustration and complaining to go along with it! What are some simple ways that you recommend for parents wanting to incorporate more movement in their child's daily routine? If you want to get your kids moving more I would say the first step is to look at what they are spending their time doing. If you are worried about a lack of movement in your child’s day it would be likely that they are spending a lot of time doing screen based play. This needs to have limits placed on it, especially with young children. Current recommendations are for no screen time at all for children under two years, a maximum of one hour a day for pre schoolers and two hours a day for school aged kids Link to reference article Some simple ways to begin to add movement into your child’s day:
Walking places or catching public transport, rather than always relying on the car
Go for a bike ride, either to get somewhere or just for fun
Leave the pram or stroller at home sometimes, or let your child walk alongside it some of the way if you are walking for a long time
Make use of your local playgrounds. There are loads of interesting and innovative playgrounds popping up and many websites reviewing and describing them
Go into your backyard (or local park if you are like me and don’t have a backyard) and play chasey or hide n seek or hopscotch or whatever your child is drawn to
Make sure that some family outings involve physical activity – hiking, playing sport together, going to a playground
Take an interest in your child’s sporting activities, watch their games or practices, cheer them on, practice their skills with them between games
Again, I am going to fall back on my same advice of follow your child’s lead. You don’t need to come up with a fancy lesson or an activity for you to lead them through, they will have the best ideas and their ideas will engage them for longer than anything else (as well as developing many other skills). Like most parents I don't have a lot of money to spend on play equipment but I'd like to save and invest in a few key pieces. What do you think are the most useful pieces of equipment that parents should invest in that can help encourage their children to move more? I don’t think you need any expensive play equipment to play or get moving – a few balls and a bike/scooter will take your child a long way. Sure, having a trampoline or some playground equipment in your backyard can be fun but it is by no means necessary, especially if you make use of your local playground and parks.
On that note we end the interview. I hope you readers have been able to get something out of that. I know I have! It's great to know that even from an expert's point of view, we don't need much to get our kids moving. To be honest I was sure there would be at least a small list of equipment that would be suggested with that last question, but looks like our local playgrounds have got us covered. I'm personally also impressed by how much movement relates to our children's over all development, even affecting handwriting and literacy skills. Who would have thought that to be so?
If you live in Melbourne, Australia and are in need of an Occupational Therapist and Speech Pathologist then you should really contact Cara at her own private practice KidsRISE. Cara works hand in hand with Speech Pathologist Miranda Van Styn. For more information please visit their website at www.kidsrise.com.au
Well I hope you can keep returning this month and join in Moving it in May. If you have any great movement based activities or games you want to share with us just leave a comment. I'd love to write a post highlighting other people's ideas and favourite activities!
It seems that with spring truly here and summer just around the corner, fairy gardens are becoming a popular topic on children's play blogs and Facebook play groups. If you look online you will find a multitude of inspiring photos of beautifully crafted fairy gardens with all the little fairy garden furniture trimmings. It's really hard not to be inspired! Who wouldn't want a magical, whimsical fairy land in their own backyard? Something to admire and to inspire fairy daydreams. A living, growing wonderland.
For me, fairy gardens are more than just a whimsical addition to the garden, they are a great way to get children into gardening and an even better way to teach children responsibility for another living thing without having the trouble of a pet. No fairy garden thrives without being watered, fed, and given enough sunlight. Thus the child must remember to water and fertilize their little paradise appropriately and make sure it stays in a spot with enough sunlight depending on what type of plants are in it. I guess they also learn to look without toughing as fairy gardens are great to look at but not something you play with.
For our fairy garden we decided on an indoor version. Our local hardware and garden store has hundreds of indoor plants and there is a specific section with these tiny little plants for around 1€.
For the base of our garden we bought a plastic terracotta planter and base which we drilled holes in the bottom of for drainage. Very important! My daughter was given the honour of filling the garden with potting mix and compost and then planting the little flowers and greenery. For those of you who are wondering, the flowers are miniature African Violets, great indoor plants!
After planting the garden, my daughter topped the garden with some rocks from our driveway. This will make it look nice and neat and keep the soil moist.
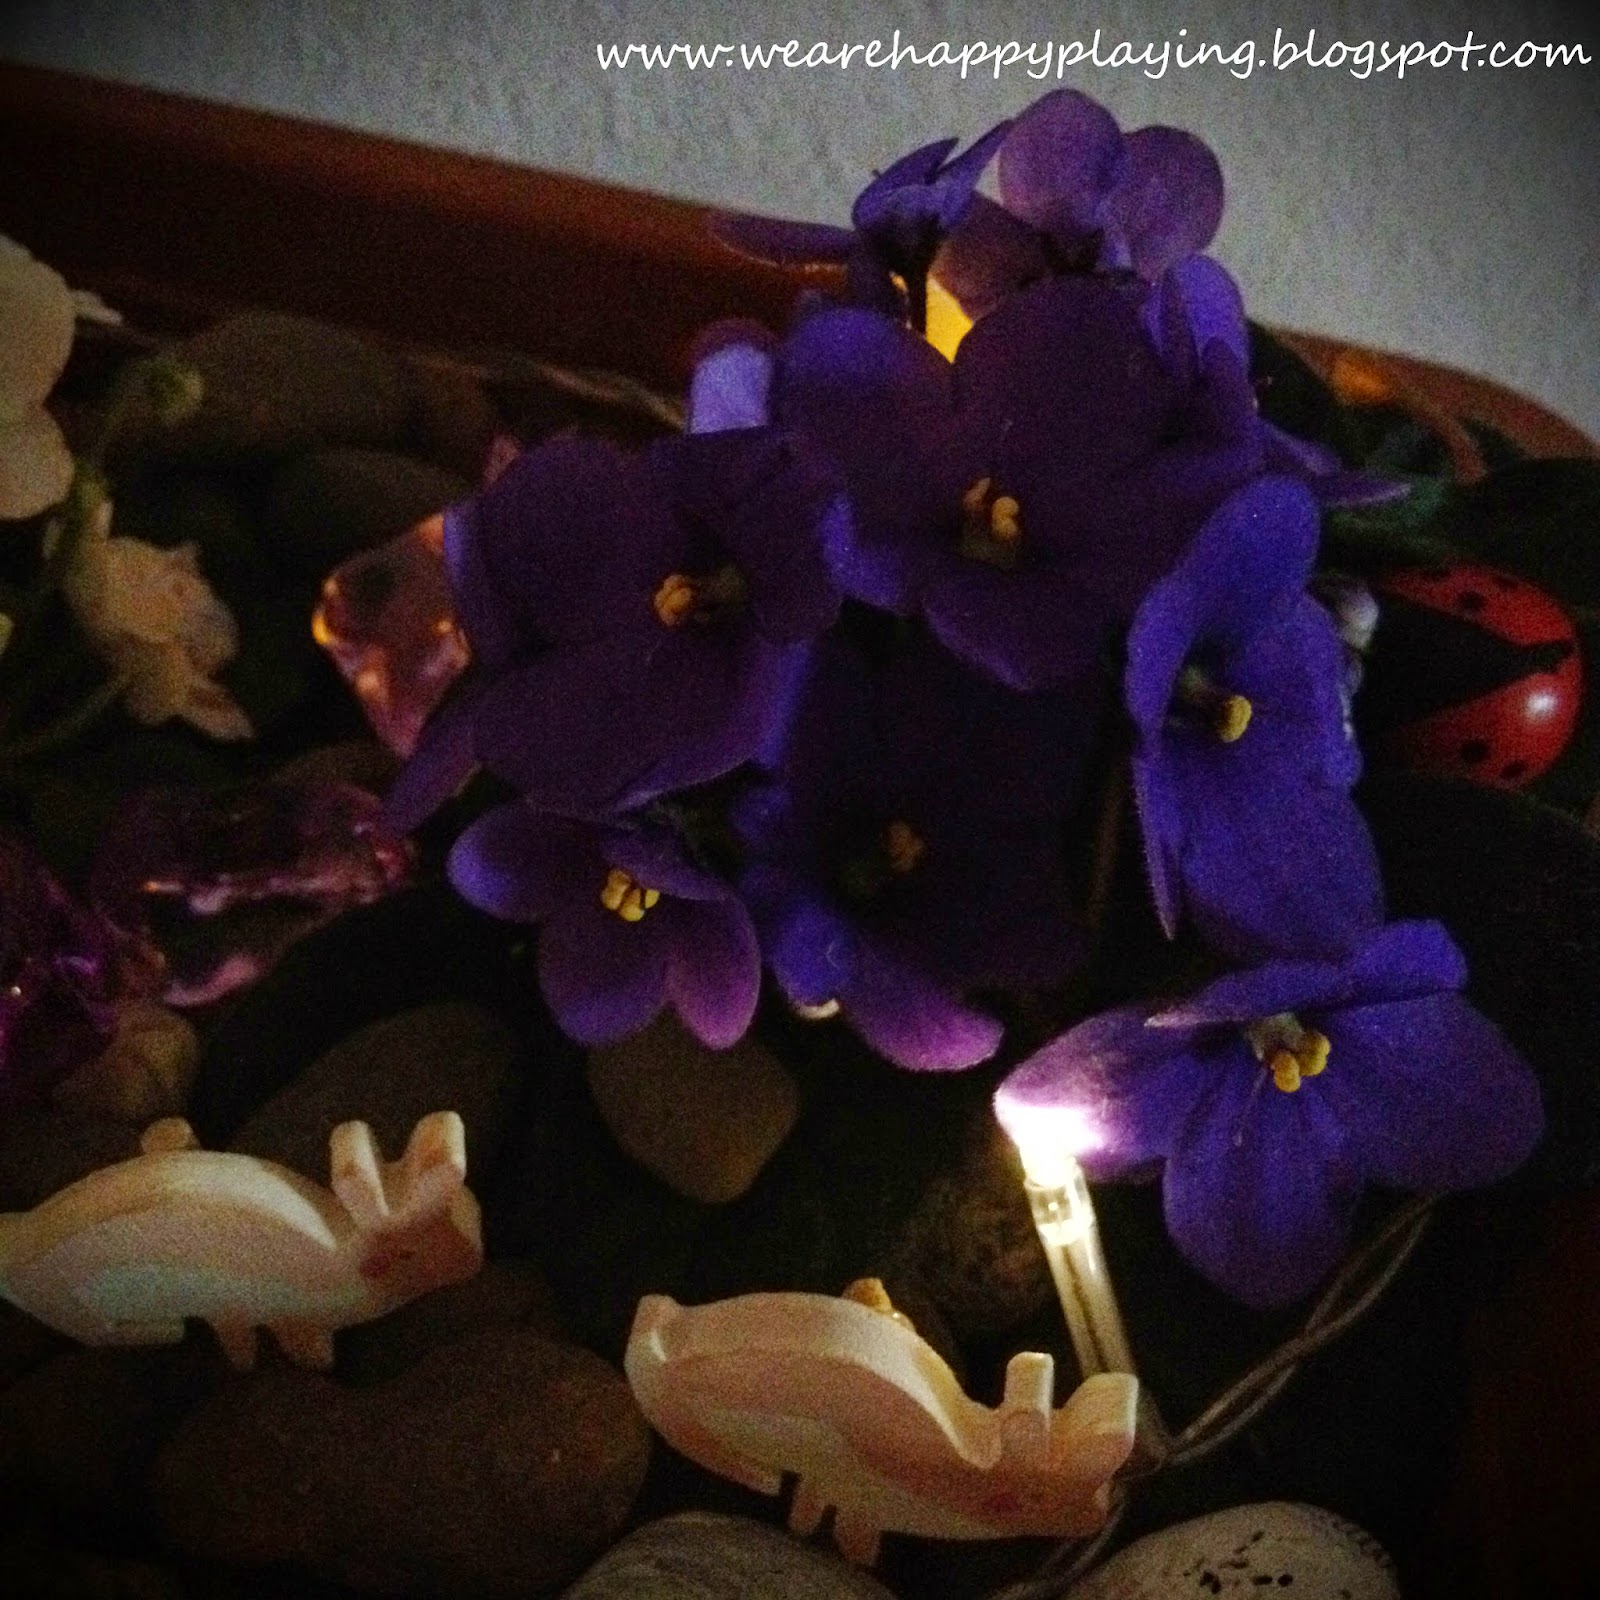
Here is the finished garden at this stage, all ready now for wonderful fairy accessories!
Now with accessories, you might say we went a little overboard. It all started with some simple little wooden animals I'd painted for Christmas tree decorations. Hot glue and a toothpick on the back and I was able to stick them into the soil so they would stand upright. With some blue rocks, bought from the 1€ shop, we made a river. The fairy house is made from gluing little sticks over a toilet roll and then using some felt and coloured paper to create the roof and door. The windows are foam flowers and the roof is embellished with a little wooden ladybug, plastic leaves and flower. Pretty ribbon is also stuck in place around the base just to make it all the more pretty.
The clothes line is made from two sticksand a bit of sewing thread tied between them and then a little dress which I cut out of felt, hung with little pegs I got from the craft store. The fairy, herself, is made from a wooden peg by attaching some wool with glue for hair, drawing the face on with markers and then gluing some felt pieces to form the dress. The wings are from an old butterfly ornament. A few more wooden ladybugs and viola it's finally finished.
In the evening we also experimented with some lighting. We tried the fairy lights and LED tea candles behind the plants to give it a dramatic look. The results were not too bad but I would like to continue to work on it to get the look just right. I am going to ask my husband if he can wire something up that will let us stick tiny LED lights in strategic places rather than on a cord like the fairy lights. The cord is just too hard to hide.
So there it is, our very own magical indoor fairy garden. My daughter loves looking at it and swoons over it, sighing and whispering "oh it's so cute!" She's tried to play with the bits and pieces but I remind her not to touch it, that it's just for looking and she seems to be OK with that. (I plan on making a playable version soon) My daughter has also started telling me that the fairies come at night when she is sleeping to look after her when she sleeps. It's so wonderful too see that her imagination has been sparked by such a simple addition to her bedroom.
Hope you have been inspired to make your own garden. They really are a lot of fun and quite addictive. I'm already buying bits and pieces for one in my bedroom. If you make one I'd love to hear about it in the comment section. Maybe even share some photos.
A long time ago I worked in after-school care and one of the games we played was Smarty Bingo. For those of you who are not familiar with Smarties they are candy coated chocolate buttons. It was a fun game where the children used Smarties to mark their Bingo sheets instead of the more typical plastic marker. At the end of the game the children got to eat the Smarties they used and the winner got a bonus handful of Smarties for winning. While it was a fun twist on a favorite game , I am not one who is comfortable giving kids sweets as part of a game and so Smarty Bingo has not been played in this household.
What do we play instead? Snack Bingo, of course! (wasn't going to throw the baby out with the bath water, just make it a little more healthy!)
Instead of Smarties we use...
Cherry tomatoes
Pieces of fruits like apple, banana, pear and pineapple
Mixed nuts, usually almonds
Grapes and sultanas
Cubes of cheese and cold meats like cabana
slices of carrots and cucumbers
As stated before the game is played like any regular game of bingo but we use food for markers. For our Bingo cards I just went over to Sparklebox on the Internet and searched Bingo cards. Just remember, because you are putting food on the cards you need to laminate them so you can wipe them clean.
Best part of this game is that before you know it the kids have had half an hour of fun, possibly learnt their numbers, colours, letters etc. and their bellies are full! What more could you ask for? It's portable and easy to take on a picnic.
As you can see from the photo here, today's session was a success!
Anyway I hope this has given you something to try around snack time. Maybe even encourage the children to try some new food? I also hope you are getting some awesome weather wherever you are in the world. We are just loving this sunny spring weather, think most snack times will be spent outside like this until this German weather throws us storms and rain at us again! It tends to do that!
Shh don't tell the hubby but I was at it again, yes I went dollar shop shopping! I love going there for play supplies. Every time I go I end up with so many new ideas and the best part at the end of the day is that I have a bag full of goodies for about 5 Euros. Well I guess we could say hubby is lucky too, oh and my daughter since she gets to play with it all.
Today's awesome find were these animal foam shapes with a sticky side! I can't remember where exactly but a while ago I came across a photo of some stamps a mother had made using old wooden blocks and bits of foam, sticks and other bits and pieces. Looking at the bag of foam pieces I bought made me think that I too could make some stamps using the foam bits and wooden blocks. Once the stamps were finished with I could always take the sticky foam off and return the blocks to their original use. It's truly a 1 minute DIY toy you can make almost with your eyes shut!
In order to make it simply get some of these sticky foam shapes, round up a hand full of wooden blocks and stick the foam pieces on them. And to think I was seriously thinking of dishing out around 30 Euros for a stamp set. More like 99 cents now!
I decided I wasn't going to spend the money on ink pads so I made an 'ink pad' from an old kitchen cloth. To make one it is important to wet the cloth, wring it out so it's still a bit wet but not dripping and then put some paint on it, spreading the paint around with a brush so it is absorbed by the cloth. If you dip the stamps into paint without doing this you just end up with sloppy blobby prints.As you can see we've mixed things up by using some other kids' stamps we already had.
Here's a preview of one of the artworks made.
My little monkey decided to add some details with textas once the prints were dry. Here she is putting eyes on all the froggies and ducks.You can't see it in this photo but later she also drew in a pond for the animals to swim in.
One of the things I like about using stamps to make artworks is that it means children of all ages and abilities can make art that is successful and effective. When I was working at a special developmental school with students who had poor fine motor skills and could not use pencils or paint brushes I would always bring out some stamps so they could feel like they were able to achieve something other than a canvas of smeered paint. You might have to first demonstrate how it's done by using a hand over hand technique but even young children get the hand of it quickly.
Anyway have a wonderful day and let me know if you give this idea a go.
Bean bags are an essential part of fun in our household. We love throwing them at each other, in baskets and behind furniture, unfortunately. For a long time now I've been thinking about bean bags with plastic pockets. This way I could use them as a learning tool as well as a source of fun. As a teacher I can't believe I didn't get my hands on some for my classroom. Imagine how much longer my students would have been focused and interested in learning the ABC's or numbers if we did so while throwing bean bags at each other while doing so.
While I will save the 'how to use these bean bags as a teaching aid' in future posts, today I will explain how to make one.
What you will need
Plastic film often used for table cloths (you can buy this at a fabric store or at the hardware store. It comes on a roll)
Non-stretch fabric pieces
Rice or wheat to fill bean bags
Thread
Sewing machine
Sewing pins
Rotary cutter
Cutting mat
Ironing board and iron
How to make
First iron and then cut out your fabric. For each bean bag you will need two pieces of fabric cut at 6 inches by 4 inches. Then cut out your plastic film at 5 inches by 4 inches.
Arrange the plastic piece so it is aligned with the bottom and sides of the bean bag fabric. There will be an inch gap at the top which you want. Once you have done that put the other fabric piece on top, right side facing in. Pin in place and sew the three sides together leaving the top open. Snip the corners and turn the bean bag inside out.
Note: When turning the bean bag inside out place your thumb on the plastic bringing it towards the side you want it to be on. For example with this bean bag I wanted the pocket on the non-print fabric side. If you do this the plastic pocket will always show up on the side you want it.
Once you have turned it right side out, poke the corners with something to bring them completely out. Pour in some filling and turn the open end of the fabric in half an inch.
Sew together shut with the sewing machine or by hand and then you are finished! All you need to do now is print some pictures to put into the pockets, with which the possibilities are endless. Here I've put in some pictures of things so we can play an initial sound game.
I hope you've enjoyed the tutorial and as always happy playing!


 To start this musical experiment we started by using the syringe to fill the glasses with different amounts of water. By using a measuring tool we could record how much water made what sound. We could test how many more milliliters of water was needed to make a noticeable difference in sound between two glasses. If I has a guitar tuner I could measure small amounts of water in order to create specific notes, but unfortunately mine is in Australia. Something that precise might also be better for older children to explore rather than my 3 year old.