Showing posts with label Toddlers. Show all posts

Sunday, May 24, 2015

DIY Backyard obstacle races without spending money on equipment!


Continuing the theme for Moving it in May we decided to get really inventive and make our very own backyard obstacle course, out of nothing but what we had lying around. Sometimes you find yourself thinking you need to fork out money on expensive equipment for your kids to get a real physical workout. I know I get caught up in that trap from time to time. In Australia we bought everything from trampolines, swings, slides and a climbing set. Now that we are on an extremely tight budget, there is no option but to make do with that we have.

As you can see in the photo above, our obstacle course has 7 elements.  The course was designed to include elements that required balancing, crawling and jumping so that the children were forced to work on their   vestibular system, their core muscles and proprioceptive sense. Jumping, crawling and tumbling also provide fantastic opportunities for children to further develop their body awareness and gross motor skills. 

Note: If you feel your children are not that great on their feet, maybe they have extra physical needs, a good idea to keep them safe is to get them to wear bike helmets. I tried this with my child before I knew that she could manage the course easily.


Following are a few photos to help you see the components of our course, how we made them and how we used them.


The course begins with sliding down this slide, which my in-laws have permanently in the garden. It's just a plastic kids' slide that you could easily pick up second hand if you don't have one. 


Next we found two long wooden poles on the side of the house. Not sure where they came from but we tied them up with some tape and they became the 'balancing beam' to walk across. 


Two more sticks, a few old bricks and tada! you have some mini hurdles. 


We were super lucky to find some old tires in the shed. This made a great balancing element for our course. Initially I thought the kids could jump in them but they decided to walk on them, balancing their way across.


A few old pots spaced like this acted as a running section with the kids having to run, weaving through and around the pots. Though at one point the kids decided to just jump over them. 


This here is a pool noodle cut in half length ways and pinned into the ground in an arch shape using tent pegs. For this element the kids had to crawl under the arch.


The last part required an adult's help to hold the hoola hoop up. For this part of the race, the kids had to do a somersault through the hoop and then run back to the slide, finishing the race.

To make it more of an official race, we wrote out names down on pieces of paper on which I then wrote the times they kids had completed the race in. I used my phone as a stopwatch which made it easy to time each child's attempt. The kids loved finding out if they'd beat their personal best time. I think timing the kids was what motivated them the most to play this game for over an hour. I am sure at the end of it they went through the course at least 30 times. (I ran out of space on the paper for writing all the times down)


Here are some shots of the kiddies going through the obstacle course.


 Anyhow I hope this post has shown you how easy it is to set up a fun physical activity for your children without breaking the bank. Of course the beauty of it is that you can redesign and arrange the course every time you set it up again, keeping the kids interested and challenged!


Until next time, happy playing!


Monday, May 18, 2015

Bowling without a ball or pins, how do we do that?

We have had the most shocking weather this afternoon, gloomy and rainy, not that cold but still not the kind of weather you go out in. My daughter thought this was a great opportunity to beg her mother for a Disney film but we'd already watched one the day before, ok and the day before that. So not today kiddo!

So while she continued to nag and play the 'I'm tired, I need a quiet film' game I searched the house for stuff we could use to play a fun and inspiring game and specifically one that did not require us to sit on our bums.

So with a hoola hoop, some bean bags and a bunch of balloons we invented our own version of ten pin bowling, minus the ball and pins.

Just to let you know this kept the whole family entertained for around an hour and we only stopped because we had to sit down for dinner. Best thing about it, the nagging for a film instantly stopped!

So if you are wondering how balloons, a hoola hoop and bean bags become a game of bowling continue reading!

What you will need
  • 5 bean bags
  • 10 balloons 
  • 1 hoola hoop
  • Something to mark a line to throw from. 
  • All breakables removed from the area. 
Just like bowling, the aim of the game is to throw something that will move ten items. This time you throw the bean bags to knock the balloons out of the hoop. Like in bowling you get a limited amount of shots to knock out the ten balloons. In the our version that we played ,we let each player have 5 shots.


Once you've had your shots you need to count how many you've knocked out and mark that down on a tally sheet

Note: If you have a preschooler or first grader you can easily use this game to introduce subtraction. Just count the balloons left in the hoop and subtract that number from ten!


Just like in regular bowling, you can play a round of 10 turns and at the end tally how many balloons you knocked out of the hoop to get your total score. Person with the highest score wins!

For anyone trying this with a non-verbal child, below are two aided language displays you can use with this game. One is specifically for this game and other other is a general numbers 0-10 that you can use with the game or for other games with numbers. Feel free to use for personal use only.

Note: If you don't know how to use aided language displays please see my post here for more details. 


I hope you get to try our version of bowling. If only I had video of my daughter playing. How she laughed every time she hit the balloons making them fly into the air! This is seriously some great family fun!

Happy bowling and happy playing! 


Sunday, May 10, 2015

Books, Story, Action!

As you might know this month is Moving it in May here at We are Happy Playing and I've been doing a lot of thinking about how to incorporate more movement into our daily lives and schedule. Since the post about children and yoga, we have made yoga a regular activity that we do after kindergarten using the Cosmic Kids' videos on YouTube and the I am Love yoga app on the tablet as part of our bedtime routine.

A daily activity we participate in as a family is story time, so I've been looking for ideas that would make story time not just a time to sit and listen, but a time where we can get active while enjoying a story. Immediately I thought about acting out what is written in the story, but what books would lend themselves to this type of activity? Luckily we had two such books sitting on our shelf!

The first one is  We are Going on a Bear Hunt by Michael Rosen.


The story is of a brave family that go out to hunt a bear. In order to get to the bear's hideout they find they need to go through a series of environmental conditions such as long swishy grass, squishy mud and a snow storm. As the family go through these different places there is great opportunity for children to use their bodies to act out the actions. Hands waving like swishy grass, stomping through gooey mud etc. 

Here are some photos of my little one, her cousin and their  interpretation of the book.

 Swishing through long grass.. Swishy Swashy

 
Stomping through thick oozy mud!

Apparently this is how these two monkeys feel one moves through the river, splash splosh. Not by waddling through it but swimming across it.

And we must not forget to hide under the covers when the bear chases us home.

 Just a little note, in looking for images of the book for this post, I came across this video which actually shows the author performing the story. How crazy random is that!? So I decided to share. While this is kinds cute and quaint, I do love the more energetic version my daughter came up with!


The second book we had on the shelf was Panda Bear Panda Bear What do You See? by Bill Martin Jr and illustrated by the wonderful Eric Carle.

In this book a series of animals are asked what they can see, with each responding with the name of another animal and the action they are performing. See pictures below.

"Water buffalo, water buffalo what do you see? I see a spider monkey swinging by me." 

"Blue herring, blue herring what do you see? I see a prairie dog digging by me. "


It's pretty obvious to see why this book makes a great story for children to move to. Simply ask the children to act out the different things the animals are doing as you go through the book.

As you may or may not know there are other books in this series with the first being Brown Bear, Brown Bear, What do You See? and Polar Bear, Polar Bear what do You Hear? While these two books focus on colours and sounds, there is no reason why children couldn't be encouraged to act like the various animals in the story, especially with the second one slithering like a snake while you hiss like one would be a wonderful physical experience for any child.

If you are looking for other books with animals that children can pretend to be try Dear Zoo by Rod Campbell and Animal Moves by Dawn Apperley. Both books are simple and children can act out the animals featured in both books.


Where the Wild Things Are  by Maurice Sendak are also lends itself beautifully to being acted out by children.Pretending to sail across the sea, stomping and growling like a wild thing all part of the fun you can have with is story.


Whilst this is just a handful of books that lend themselves well to being acted out through movement I am sure there are many more and we plan on finding those over the next month or more. Maybe you yourself have some that you know of? If you do we would love to hear from you in the comments section.

Until next time happy story time and happy playing.


Thursday, May 7, 2015

Yoga for children and online class ideas for families on a budget

As you may already know here at We are Happy Playing, we are celebrating Moving it in May, making May the month that we try to incorporate more movement in your lives. As part of this commitment to more movement I decided to look into the art of yoga and how it can be practiced by young children.

What is Yoga?
To be honest I don't know where to even start with this question as yoga encompasses so much and it is not just one practice, there are several different types of yoga all with a different focus. The best way I could sum it up was- Yoga is a is a  physical, mental and spiritual practice or discipline that includes holding particular poses, meditation and breathing techniques among other things. Apparently the word yoga means "union": of the individual consciousness or soul with the Universal Consciousness or Spirit.

So what are the benefits of  practicing yoga for your child? 
If you have ever looked at the literature online, you will quickly learn that the benefits of practicing yoga are many and  not only benefit the child physically, but when done with intention, can also benefit the child mentally, emotionally and spiritually.

Benefits include 
  • Enhanced physical flexibility and physical strength
  • physical fitness
  • Better body awareness
  • Refinement of balance and coordination
  • Strengthening core muscles  
  • Better focus and concentration  
  • Boost in self-esteem and confidence 
  • Strengthening of the mind-body connection
  • improved posture
  • reduce physical and mental stress
  • enhance discipline
  • improved breathing and circulation
  • Constant self-discovery and inquisitiveness 

Yoga and children with Special Needs
What I have found most surprising is that yoga has been found to be particularly beneficial for children with special needs.Visi Tilak in this article explains that  "Studies have shown that yoga benefits children with autism and ADHD. The National Public Radio has reported that researchers surveyed teachers at a Bronx public school that had a daily yoga program and found that the program reduced kids' aggressive behavior, social withdrawal, and hyperactivity, compared with a control group of kids with autism who did not practice yoga."  Kristie Patten Koenig, Ph.D., an associate professor of occupational therapy at New York University says yoga was effective because  "it seemed to play to the strengths of kids with autism while also reducing stress." It has also been shown that yoga helps address kids' heightened anxiety, poor motor coordination, and weak self-regulation, all of which are typical with children with Autism.

Eliyabeth Rowan talks about Autsim and Yoga in her article "As we know children with autism often suffer from a highly sensitive nervous system and are easily over stimulated by their environment. Yoga’s natural setting of dim lights, soft music, smooth mats, and “inside” voices creates a comforting environment that helps children with Autsim relax. Also as Elizabeth Rowan states  "Yoga’s physical poses allow nervous energy to be released from the body in a controlled manner, also leading to a calming sensation. Less stimulation means less uncontrollable behavior, outbursts and repetitive nervous movement.  Elizabeth  also says that "Yoga is particularly instrumental in helping kids with autism learn self-regulation. By becoming aware of their bodies and aware of their breathing, yoga provides them with the ability to cope when they start to feel anxious or upset." Furthermore yoga is orderly and consistent which helps children with Austism stay calm as many thrive when things are ordered and predictable.  Whilst I am no expert in yoga, I can only imagine that the deep pressure on the joints and limbs from some of the poses must also be beneficial in calming a child who seeks out deep pressure and who benefits from any heavy work or weighted vests and blankets. 


How to introduce yoga to your child
From my perspective, there are two options when it comes to introducing your child to yoga.

Option 1. Fork out money and enrol them in a kids' yoga class.
There are quite a few advertised on the Internet run by teachers who are experts in yoga and working with children. There are even classes specifically designed for children with special needs.

Option 2. Get hold of some beginner yoga books and do teach your child yourself.
 If you ask me that seems a little daunting. When I look at that list of benefits listed above, I can't help but think to myself, how can  'I' achieve that with my child through yoga? There must be special teaching techniques that you need to know about to achieve so much. I might be able to do the poses but I have no clue about breathing techniques etc.

All I can say about option 1 and 2 is that  I want an option 3! I don't have much money for classes but I don't feel confident in just doing it myself. Is there a way I can spend little or no money to access some online classes? Looks like there is! 

If you go to YouTube and type in Yoga for kids you will find that there are some videos of kids' yoga classes. Below are two I came across that I think are really good.


I love how the teacher talks about breathing and describes the poses using language children can relate to like "hold your hand up like they are carrying a big ball" I am only disappointed that I can't find anymore videos like this although the two together are over an hour's worth of yoga so that could be enough.

I also found a lot of Cosmic Kids Yoga Adventure videos. I can see these videos being very attractive to young kids. Combining a story with poses and songs makes this a wonderful yoga experience. The only problem I had was that I felt the poses were done a little too fast for a child to follow. I personally would like to hold some of the poses longer. Also there is no focus on breathing which isn't all that bad if you are doing it with toddlers it might be enough for them to just try and make the poses. Below are two examples of YouTube videos I found for this series.


I recently also came across YogaDownload, a website you can subscribe to for 1, 3,6 or 12months at a cost which I think is reasonable. For a month with unlimited classes and 4 free classes to keep, you pay just $10.00. For 12 months and unlimited classes costs $90.00 I know when I did pregnancy yoga classes were around $10.00 a pop so this is much cheaper especially if you do one everyday. Now there are not only adult classes but there are around 10 kid's classes and about 5 guided meditations for children.as well, hence why I'm mentioning it here. If you were to get the unlimited 1 month subscription for $18.00 I think you could cover all that and download the kids classes to keep and play forever.

If you have a tablet, there are also various kids' yoga apps you can try for free or buy for a few dollars. Some that I have tried recently with my daughter are Mon p'tit Yoga, the free version, and I am Love, Kids' Yoga Journey, which cost 99 AUD cents. Both are available on android powered tablets. (not sure if it's also available for IPads too)


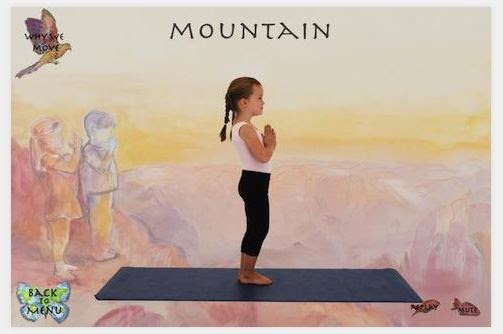
I am Love, Kid's Yoga Journey is my favourite app. It has beautiful water colour illustrations as backgrounds and clear photographs of children going through the 13 poses. Each pose is explained perfectly and shows how you transition from one into the other.There is also instructions regarding when and how to breath and a button you can press to find out what the pose is good for. The app also is accompanied by beautiful guitar music which can also be muted if you like. 


Whilst not my favourite of the two, Mon p'tit Yoga or My Little Yoga is also a lovely app that has two component,s the poses and a game related to the poses. The poses are illustrated through different animals and the graphics are very much targeted at toddlers. The poses are explained in writing and you can also play an audio clip that tells you how to perform the pose. Some poses also has a bonus story to enjoy. The game is simple and not really a feature worth mentioning, just a simple matching game. Still, a good little app for beginning yoga.


Anyway I hope you have found this post inspiring and informative. Mabe you've even tried yoga with your child before?  We personally have decided to use the I am Love, a Kids' Yoga Journey app to kick start our yoga journey. My daughter has found it the most appealing and accessable of all the videos and apps and I like it too. We will let you know how we go in a future post.

Let us know what you think and if you end up trying any of these videos or apps. Until next time, keep moving and happy playing.

Thursday, April 23, 2015

Paper Story Stones, first time trying them

I don't know about you but I am loving these story stones that I keep seeing around the Internet. At first I wasn't sure what they were all about but the lovely women at Sensory Play Ideas for Children helped me out.

So these story stones, what are they all about? Well they are stones with pictures on them that help children, and adults alike, to initiate the telling of a story.

One way you can use them is by putting them all in a bag and then the child picks a stone out and uses the picture on the stone to start the story telling. You then pick out another and use that image to guide the next part of your story. You continue picking out stones and using the pictures to guide the rest of the story. Another way is to sort some stones in a sequence and then get the child or adult to tell a story in the order that the stones show. The stones with their pictures can help a child retell a familiar book by sequencing the pictures in order.

Whilst I love the concept of story stones, at the moment I do not have the time to gather stones and paint pictures on them and neither do I have the money to buy some already made. What I do have though is some time to make and print these paper laminated versions. As you can see I've still kept the stone theme but they are a from a file I made in Microsoft Word and then printed. Easy to make multiple sets!

Here is a basic 'Fairy Tale ' set  I'm making at the moment. I'm using the picture communication symbols from Boardmaker for the pictures. I'm also including the written word as I think this could help children familiarise themselves with the words, and in turn further their reading skills. (I caught my daughter the other day sounding out the initial letters to work out what the pictures were of)


I am the first to admit that these are not as nice as the painted stone versions but sometimes limited time and money means compromise. I must say laminating them does help make them smooth and shinny like a stone (OK I'm trying really hard here to sell them aren't I? Hehehehe). But then again one thing that may convince you of the value of this version is storage and portability. From what I've seen on the Internet, the stones used look quite big and would probably weigh a bit too if you're taking a bunch of them on a trip or outing. They would also need containers for storing and depending on your child, they could also be thrown around and cause a bit of damage! For this reason I think paper  can be a great option too. Who knows, one day I might manage to make them look nicer too!

In order to test how story stones work, I gave it a go the other night by randomly picking one out of the pile to start the story telling and then randomly picking out another to continue. I also wrote the story down so I could share it with you. I must admit, at first I thought it was going to be awkward and hard to keep a story going with random pictures dictating the story but it wasn't, rather it was amazing how inspiring this system is. I would never have thought up of this story on my own! Hooray for story stones!

Here is the story I made up using the `fairy tale`set randomly. 


The Underwater Castle: a story stone inspired tale! 
 (story stone picked highlighted in red)

Once upon a time if you stood by the banks of this enchanted pond you could see a glimpse of a spell bound castle that lay beneath the water. The castle had been captured by a jealous witch who wished to rule the kingdom herself. With a wave of her wand she had cast a powerful spell that condemned the castle and all who lived in it to a life underwater. 

While the witch thought that she'd captured the whole court, there was one who had escaped this watery fate. That someone was the beautiful princess. The princess was not in the castle that day but instead was visiting the house of an old lady she'd befriended. The lady lived in a nearby village. The princess was introduced to this old lady by the queen herself, who was fond of the  parties, cakes and tarts that the old lady baked. The queen's favourite was one of the old woman's family recipes, strawberry and rhubarb tart. 

Since the disappearance of her family and the castle, the princess had made it her mission to find them and to bring the person responsible for their disappearance to justice. She knew she couldn't do it herself so she asked her fairy godmother to help.  The fairy godmother had a clue as to what had happened to the royal family and castle. She told the princess of how she was flying around the forest the day her family disappeared and while she didn't think much of it at the time, she did remember seeing some magical fireworks and lights in the near distance. Could that have something to do with the missing castle? 

That night, by the light of the full moon, the princess and her fairy godmother flew on the back of a the fairy godmother's pet dragon to the place in the forest where the fairy godmother had seen the lights. They didn't want anyone to notice them so they dismounted the dragon by the edge of the forest and then took a winding path through the forest to the spot where the lights came from. 

At first they couldn't see the pond in front of them but as the moon came out from behind the clouds and shone its silvery light, both the princess and the fairy godmother could clearly spot the simmering waters of the pond. While they stood there looking at the pond they noticed the presence of a tall slender figure that had a pointy hat and cloak on. It was the wizard of the forest and he looked grumpy! 

"What's wrong?" asked the princess. 
"I am tired of that nasty witch and her evil spells!" exclaimed the wizard.
"Nasty witch?, why is she nasty?" asked the fairy godmother.
"Because she has done a most unbelievable and despicable thing!"
"What?" exclaimed both the princess and the fairy godmother in unison. 
 The wizard rubbed his beard, leaned in close and whispered..."She put the castle and the whole royal family in MY pond!" 

The princes and  fairy god mother looked at each other with surprised expressions. They did not expect this for an answer.
"What a truly evil witch! How can we get the castle and my family out?" asked the princess. 
"We must wait for a rainbow to appear, then I can gather all my power and cast a counter spell that will put everything right!" declared the wizard. 

So the three of them sat up all night waiting for morning to come, hopefully with a rainbow! But when morning came there were no clouds or rain in sight. The three friends grew desperate. Before the princess, and her company could lose all hope they came upon a gnome. The gnome had heard the three talking the night before and knew that he could help. 

"Hello princess, I think I can help you! I, you see, am a special magical gnome who controls the weather and I can conjure a rainbow for you. I'm a big fan of your dad the king and it would be an honour to help you his daughter."

The princess was so happy. She ordered the gnome to work his magic immediately. As the rain fell and went and the rainbow appeared, the wizard got to work and cast his spell. Out of the pond rose the castle and with a flash and a lightning blitz the castle returned to it's rightful place in the center of the kingdom.

The witch flew in quickly shocked to find her spell had been broken. She tried once more to recast the spell but as she waved her wand a large mighty bird came out of the sky and plucked the wand out of her hand. Without it the witch had no magic. The grumpy wizard, who was so upset with the witch's actions finally had his chance to take revenge and with the wave of his wand turned the witch into a a gold trimmed coach which he offered the princess and the fairy godmother for their journey home.
And so until this day still the princess and her family still use this coach for trips in muddy weather just to make sure the witch had learnt her lesson! 


And that is the end of my first story stone fairy tale! I've kept true to the game and not edited anything, writing exactly what had come into my head as I picked the stones.

Now to test them on darling daughter! Will let you know what she thinks and if she is able to use them for story telling in a future post!

Happy story telling and happy playing!


Wednesday, April 22, 2015

Free Aided Language Displays for stamp art activity

Looking at my blog stats I can see that the DIY foam stamps and ink pad post has been a popular idea/activity. (See here for post) For this reason I have decided to give you all a free Aided Language Display (ALD) to use when making art with stamps.

If you are not familiar with what an ALD is, and how to use it, please read my post on Aided Language Displays here. Basically they are a communication tool that is based on picture communication symbols which a child with limited or no language can use to communicate simple ideas for any given topic or activity. I have used them extensively when teaching students with special needs.


In order to make one for yourself just click on the picture below, save and print! As mentioned in the other post I do recommend you laminate it before use so it doesn't get damaged. Trust me this is very likely!


I designed it so children can comment about how they think their art looks using beautiful or yucky. They can also request the tools they need to complete the activity, ink pad, paper, stamps. I thought it was good to include 'turn' as well as sometimes children want their play partners to take a turn adding to their art. I know my child does! Stamp art can also get messy, messy tables, messy hands so I've added cells where children can ask to clean their hands or comment that something is messy or dirty. Push has been added there as a child might ask for help to push or press the stamp. They might want to tell you that they want to press the stamp. And with the 'different' cell they can of course request a different stamp or colour. 'Finished' gives the child the opportunity to say they've had enough which I think is important. 

What I thought might also be useful for this activity is another ALD with just colours and shapes. Just click on the picture, save, print and laminate. You can use this for this activity so children can choose colours. If your stamps are of shapes then they can also make comments about the shapes they'd like. Of course this is a useful ALD for any art project or where you are working with colours and shapes. For example you might be building with Lego and want your child to communicate what colour block they want.

Note- These ALD's are my own work. While I obviously don't mind people using them for personal use, in under no circumstances are they to be used for commercial gain. If you would like to share these with other people please do not copy and paste them on another blog, website etc. but rather link back to the posts here at We are Happy Playing.

Please if you are using these ALD's let me know how you go in the comment section below. I would love to know if they are of any help and if you think something should be changed or added.

Happy playing!

Monday, April 20, 2015

Aided Language Displays, helping children communicate and play

Apart from discovery, I believe that communication is a key part of play. Children learn to name objects through play, make requests, comment and negotiate with peers. But what if your child has no or limited language, be that because they are still young or be that because they have a developmental issue? How can they communicate during play? How can they develop deeper connections with peers that language affords us?

One of the most effective tools I used when teaching children with no speech or limited speech was an Aided Language Display or ALD. With an ALD I could give children the opportunity to open up and communicate with me on a certain topic or activity. After much frustration I was finally able to understand more about the children's likes and dislikes. I could easily attend to their needs because they were able to easily make requests. And being able to make comments  like "wow" and "oh no" really made the play session come alive. I was now becoming more a play partner than just the teacher who was watching a child silently play on their own. 

Once more children were using the ALD's successfully, I started witnessing moments where the children were starting to communicate simple ideas with each other. In special developmental education this is like  witnessing lightning strike before you. From my experience it's just that rare. And with more communication came more willingness to play, and more willingness to engage with others which in turn meant more laughter and more fun!

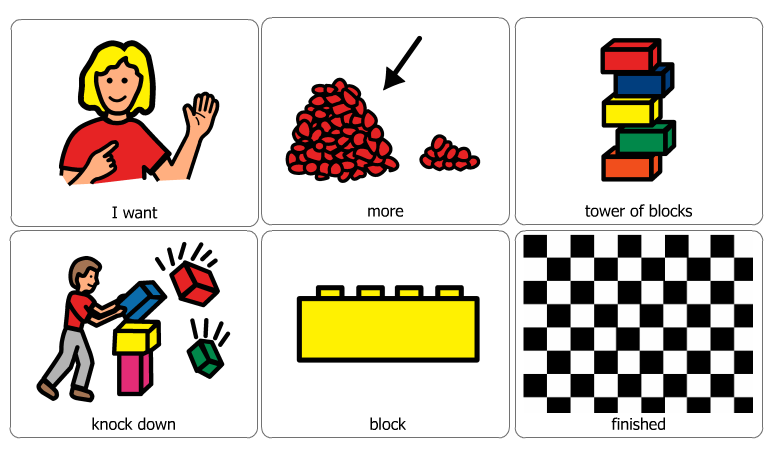
So what exactly is an ALD? Well an ALD is often a one sided A4 page that has printed on it a set number of cells usually between 6 and 20. Within each cell is a picture communication symbol or PCS. The PCS's are related to a particular activity and are chosen so that anyone can by pointing to the symbols and make simple sentences for requesting, commenting and questioning.

Very simple 6 cell ALD for building a block tower

Below is a picture of an ALD I made for the Marble Maze game I posted earlier.The symbols I've used are from Boardmaker and are typically used in special educational settings. (save picute and print for your own use)

As you can see the child can point to a series of cells to make requests  like "I want a block"  or "I want to build a maze". They can also instruct their play partner by pointing out "Your turn"or "you build a maze" Likes and dislikes can be easily communicated by pointing to the 'I' and 'like' cell. A child can also let you know how they feel about the maze by pointing to the 'hard' or 'easy' cell.  Furthermore the child can  express surprise and disappointment using the 'wow' and 'oh no' cells. 

As you might have noticed the board is set up so that most sentences are made by moving left to right. Key cells like 'I' and 'more' are usually in the same position for other ALD's. This helps the child to make sentences quicker as they have already become used to the position of these cells. 

Children do not automatically know how to use these boards, there is some teaching involved. Most of that teaching is done by modeling done by the adult. You can demonstrate how to make sentences by doing it yourself during a play session. Point out the sentences and say the sentence while you do so. You can then help the child by taking their hand and helping them make a likely comment. If you can see that they don't want to play anymore you could take their hand and help them point out "I'm finished" or "I don't like that". I think what is also key to using ALD's successfully is teaching new PCS's exclusively outside of a play situation as well as during play sessions. Some time dedicated in simply learning to recognise the symbols and their meaning.

 If you are working with a child who has limited speech or usually uses one word sentences, encourage them to verbally express what they are pointing to. I've had students with Autism, who would only use one word requests, start to speak in simple 2-4 word sentences, even without the use of the ALD. While I have had such success with some of my students this did not happen overnight but after a lot of work and play using an ALD.

While I think the world of ALD's, they are not without their issues. Some people criticise them for their limited vocabulary. Some people find them a nuisance to take around while playing games with a lot of movement. For me, I think having any vocabulary and option for communication is better than none. And yes they can be a bit of a bother to take with you when you are running or moving around but nothing beats giving a child the opportunity to communicate and the connection that communication can forge between people.And what's more is that you don't need to have lots of money to afford ALD's unlike other communication devices, just a computer, printer and laminator, things people often already have at home.

If you are interested in trying out ALD's with your child then please fill free to save the ones here and print them for personal use. Do laminate them before use because during play things can get rough and sometimes messy, and if not laminated they tend to get ripped or scrunched. Ok, ok and stained on occasions from spilt juice.

I have never used an ALD with a toddler before but I could imagine that it would be an effective way to encourage communication before they are able to speak or speak clearly. But then again I am no expert in this area and cannot guarantee that this would be effective with a toddler. You might like to consult a speech therapist before you try it. 

Note: Being a blog about play for all abilities I have decided that I will always provide an ALD for any activity that I share that people can save for personal use, so do stay tuned for that!

Anyway I hope this post has been helpful and given you some tools for encouraging communication and play.
If you've tried the ALD let me know how it goes and if it can be improved with more or different vocabulary.

As always happy communicating and happy playing!
  

Saturday, April 18, 2015

Water play threading, a sensory and fine motor skill experience

I am a sucker for browsing in those cheap dollar shops, always looking out for little bits and pieces I can use for play experiences. Today I was blessed with a real treasure of a find. The longest neon coloured straws I have ever seen. I
don't even know why they are manufactured because from a drinking straw perspective they are as useful as a waterproof teabag. I mean who keeps their drink a meter away when drinking? I guess you could have your drink on the floor and use the straw so you don't have to pick it up but really these straws were screaming for a repurpose! The other awesome find I found was foam beads! I can't believe they sell these. I bought a packet for 99 cents that were flower themed. 

I know there will be a hundred different ways I can turn these straws into a fun activity but last night they became the key piece (or pieces if you will) in a bath time game. That game was Water Play Threading and it kept my daughter busy and happy for a whole half an hour. It would have been longer if I wasn't concerned about the level of wrinkliness her hands and feet were sporting. For the activity I just cut up a few of the straws and gave my daughter a plastic stringy thing ( I'm not sure of the technical term) to use to thread them through. It became a lot more fun than normal threading because she had to sieve through the bubble bath foam to find pieces. Kind of like a treasure hunt game and threading all wrapped in one activity.

So that I can show you some photos of the activity ( I couldn't get any of her in the tub where her pink bits didn't show)  I set up the activity again in a tub for the play room. The little one enjoyed it just as much as she did in the bath which is great because sometimes you just want to play with water without having to shampoo your hair at the end!

As you can see in this photo, before I really foamed thing up with dish washing detergent, I just needed to add the foam beads, cut up straws and a plastic thread.

Note: bit of a bubble/foam hack- use a whisk to make bubbles and foam without having to splash about! So easy and quick!


This activity is more than just water play, it is also very good for developing fine motor skills while honing in on the sense of touch. You see the pieces are hardly visible when hidden in the bath foam so my daughter only has her sense of touch that she can use to find the pieces. You can also give your child pattern making charts that he/she can use to thread colour patterns making it also a numeracy experience.

I have to say using the plastic thread makes it much easier for younger kids to complete the activity too. Unlike regular string it is quite stiff and stays straight while a child threads things on. The wider circumference of the straws also makes it easy to thread. I highly recommend using these items for first time threaders!

If you are interested I'm developing a pirate and mermaid theme version of this activity so stay tuned!

Happy threading and happy playing.

P.S Thanks Papa for letting us girly you up a bit!